Shooting Star Time Lapse: Capturing the Wonders of the Night Sky
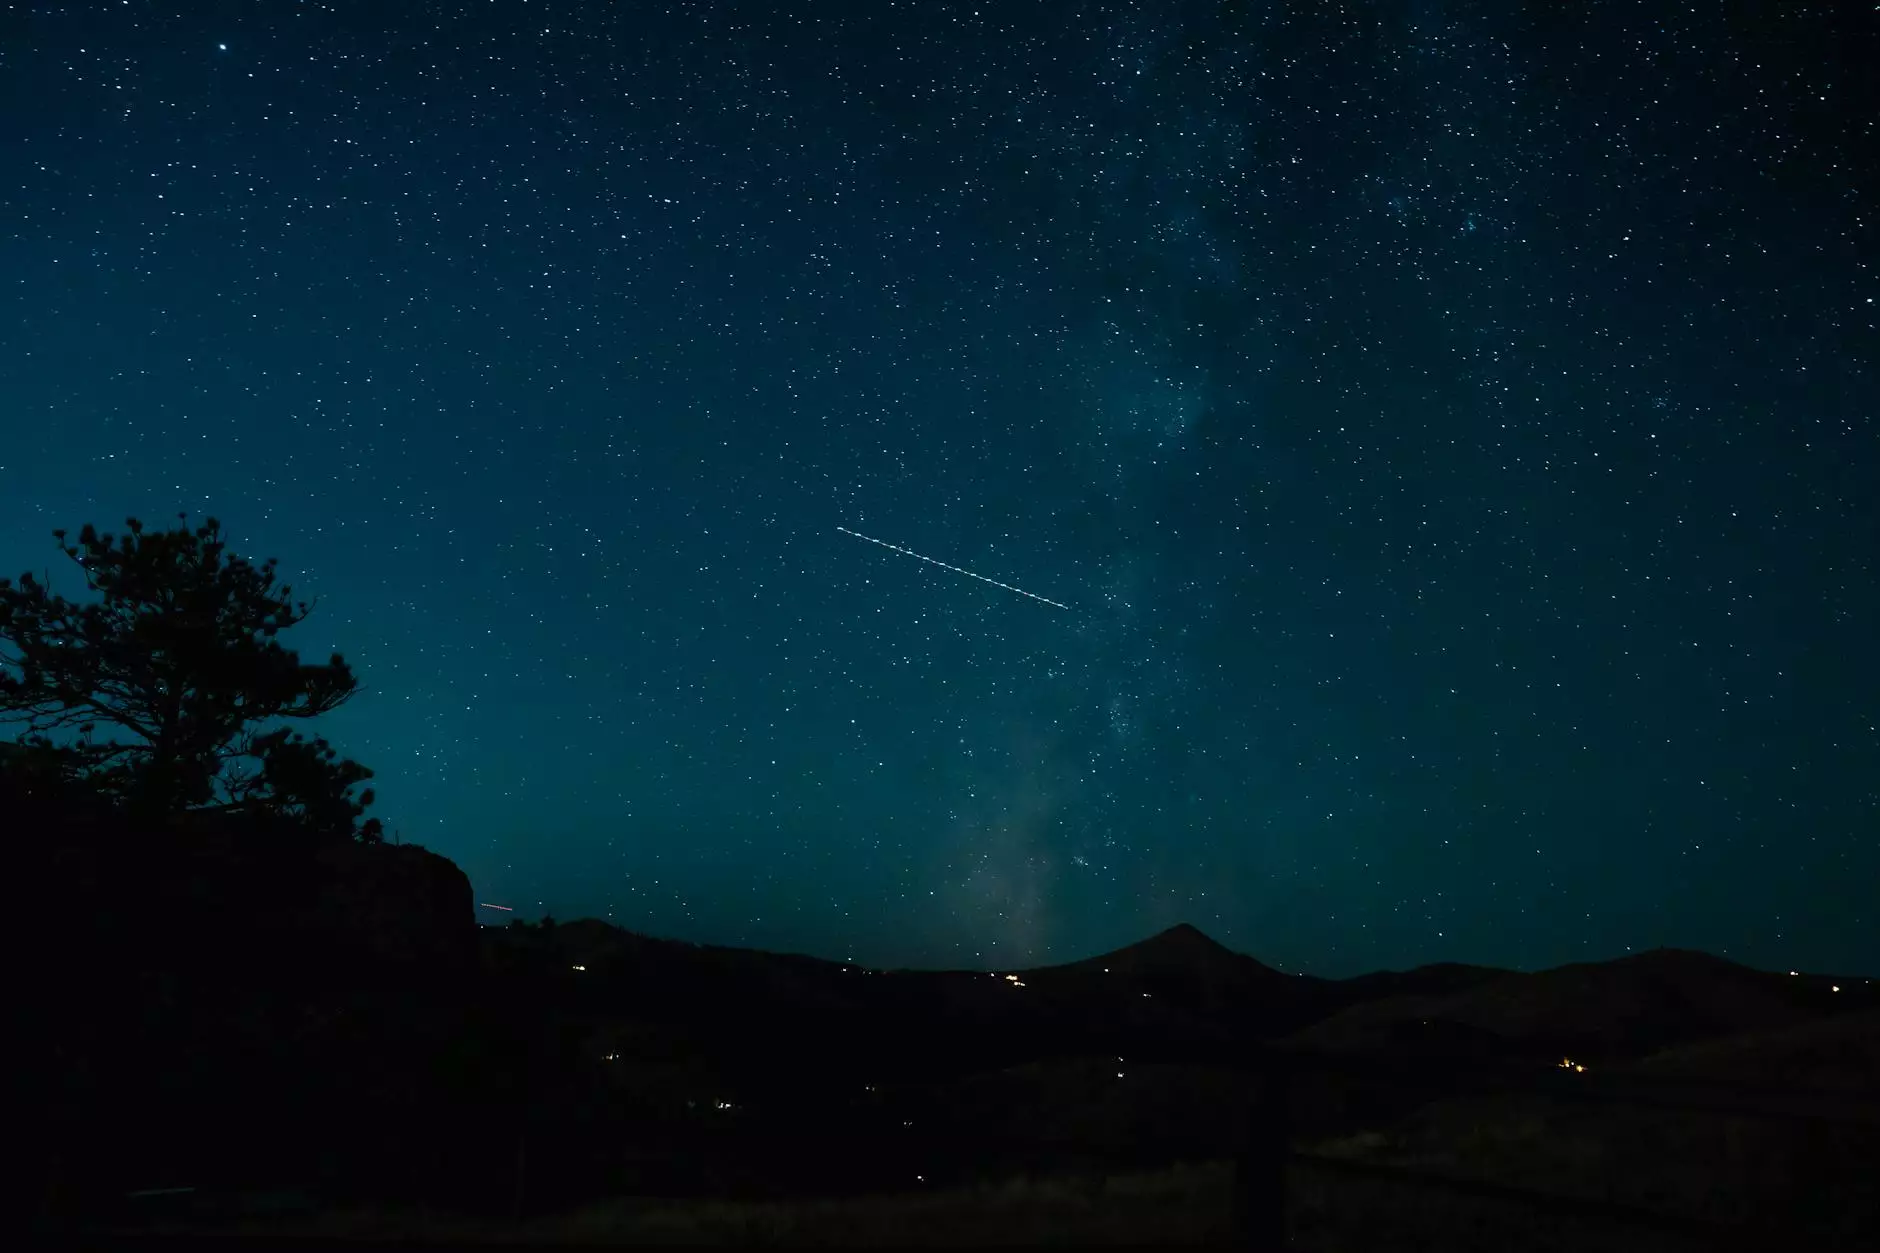
Photography has the uncanny ability to freeze time and capture moments that would otherwise be lost in the blur of everyday life. Among the most mesmerizing elements of photography is the art of shooting star time lapse photography. This technique not only showcases the brilliance of celestial events but also engages the viewer's senses in a way that traditional photography cannot. In this article, we will delve deep into the world of shooting star time lapse photography, exploring techniques, equipment, and the magic behind capturing the night sky in its full glory.
Understanding Time Lapse Photography
Time lapse photography involves capturing a series of images at set intervals to record changes that take place slowly over time. When played back at normal speed, the final result creates a mesmerizing video that showcases the passage of time. Shooting star time lapse specifically focuses on creating dynamic visuals of meteor showers and other astronomical phenomena.
1. The Allure of the Night Sky
The night sky has captivated humanity for centuries, serving as a canvas for countless myths and stories. The sight of shooting stars, or meteors, streaking across the sky evokes a sense of wonder and excitement. Here are a few reasons why capturing shooting stars is a popular pursuit among photographers:
- Emotional Connection: The beauty and unpredictability of shooting stars evoke emotional responses, making them engaging subjects for photography.
- Astronomical Events: Meteor showers occur at specific times of the year, allowing photographers to plan their shoots around these celestial events.
- Unique Visuals: A well-executed time lapse can turn ordinary scenes of the night sky into extraordinary visuals that tell a captivating story.
2. Essential Equipment for Shooting Star Time Lapse
To create breathtaking shooting star time lapse footage, you'll need some essential equipment. While you don't need the most expensive gear, having the right tools will significantly enhance your results.
Camera
A camera capable of manual settings is crucial. DSLR and mirrorless cameras are ideal because they allow photographers to adjust settings such as aperture, exposure time, and ISO sensitivity for optimal night photography.
Lens
Your choice of lens can affect the outcome of your photographs significantly. A wide-angle lens (preferably between 10mm and 24mm) is often recommended, as it allows you to capture more of the sky in each frame. Look for lenses with a large maximum aperture (f/2.8 or wider) to enable better light performance at night.
Tripod
A sturdy tripod is non-negotiable for time lapse photography, especially in low light conditions. Ensure your tripod can handle the weight of your camera and is stable enough to prevent any shake during long exposures.
Remote Trigger and Intervalometer
To avoid camera shake, use a remote trigger. An intervalometer can be invaluable, as it allows you to set intervals between shots automatically, thus streamlining the shooting process.
3. Choosing the Right Location
Location plays a pivotal role in the success of your shooting star time lapse project. Here are some factors to consider:
- Dark Skies: Look for locations away from city lights and pollution to experience the truly breathtaking beauty of the night sky.
- Accessibility: Ensure the location is accessible at night and is safe for you and your equipment.
- Clear Skies: Check weather conditions and ensure minimal cloud coverage for the clearest shots.
4. Shooting Techniques for Capturing Shooting Stars
Now that you have the necessary equipment and location, it’s time to set up and start shooting. Here are some techniques that can help you capture stunning shooting star time lapse footage:
Manual Settings
Adjust your camera settings manually for night photography. Use the following settings as a guideline:
- Aperture: Set your lens to the widest aperture (lowest f-number) to let in as much light as possible.
- ISO: Start with an ISO setting between 800 and 3200. Higher ISOs will introduce more noise, so adjust according to your camera's performance.
- Shutter Speed: Use long exposure times, typically between 15 to 30 seconds, depending on the brightness of the stars and the desired effects.
Focusing
Focusing at night can be tricky. Use manual focus and focus on a distant light or star to get sharp images. A technique called "hyperfocal focusing" can also help achieve depth of field, ensuring both foreground and background remain in focus.
Taking the Shot
Once you have everything set up, start taking your shots in intervals. Depending on the meteor activity, you may want to shoot for several hours to capture as many shooting stars as possible.
5. Post-Processing Your Shooting Star Time Lapse
After your shooting session, the next crucial step is post-processing your images to create a stunning time-lapse video. Here’s how to do it effectively:
Importing and Sorting Images
Start by importing your images into your preferred editing software. Sort through them, discarding any that are too blurry or poorly exposed.
Stacking Images
You can create smoother time lapses by stacking images in software such as Adobe After Effects or dedicated time-lapse software. This process combines images frame by frame, ensuring smoother transitions and highlighting shooting stars.
Creating the Time Lapse
Compile your images into a video file. Adjust the frame rate to achieve the desired effect. Typically, a frame rate of 24 to 30 frames per second is standard for smooth playback.
6. Tips for Improving Your Shooting Star Time Lapse Experience
To ensure a successful and enjoyable shooting experience, consider these additional tips:
- Be Patient: Meteor showers can be unpredictable. Sometimes you'll have to wait for hours, so enjoy the experience.
- Practice Makes Perfect: Don’t be discouraged by initial attempts. Practice different settings and techniques to refine your skill.
- Engage With Nature: Take the time to appreciate the beauty around you, as being outdoors under the stars is a rewarding experience in itself.
- Share Your Work: Consider joining photography communities online. Sharing your work can provide you with valuable feedback and inspiration.
Conclusion: The Magic of Shooting Star Time Lapse Photography
Photography is far more than just a hobby; it is a form of art that allows you to share your interpretation of the world. The beauty of shooting star time lapse photography lies in its ability to showcase nature’s fleeting moments, transcending the barriers of conventional photography. As a photographer, embracing this technique not only enhances your skills but also deepens your connection to the world around you. From choosing the right equipment to perfecting the art of post-processing, every step holds the potential for creativity and discovery.
Now, equipped with the knowledge and techniques outlined in this article, you are ready to embark on an exciting journey through the cosmos, capturing the magic of shooting stars for all to admire. Don’t forget to check out bonomotion.com for more insights into photography stores and services, photographers, and specialized areas like real estate photography. Let your creativity soar as you step into the wondrous world of night sky photography!